While a dice bag might be good enough to hold all of your dice, nothing beats the organization and versatility that a dice box gives you. Dice boxes allow you to separate all of your dice into their own compartment, so that you can easily identify and access them when you need them. Larger dice boxes also give you space to store items like miniatures, pens or pencils, and character sheets and documents. Also, the lid doubles as a rolling tray.
The benefits of a dice box are clear, but professionally made boxes can be expensive. A fancy wooden one can sometimes cost hundreds of dollars. Luckily, with 3D printing, you can make our own dice boxes for much cheaper. You don’t even need any woodworking skills. All it takes is a 3D printer and some finishing touches and you’ll have your own custom dice box.
In this article I’ll go over how to find and choose the right 3D model for your dice box, and the different ways you can print and customize it. As an example I’ll show you my own dice box that I’ve 3D printed and customized. I’ll also explain the different options you have for lining and closing your dice box.
Choosing a Model
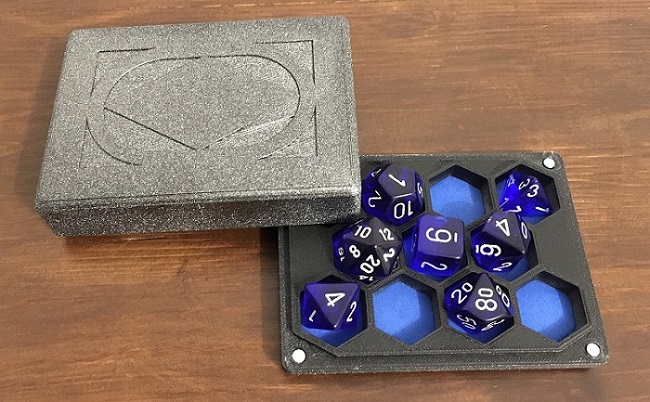
If you look online on sites like Thingiverse, you’ll find a huge amount different designs for dice boxes. Each one is designed to contain different materials, so you should first decide what your needs are. Are your dice small or large? Do you want to be able to store writing tools? What about papers or miniatures? Some boxes, like the small speckled silver box that I made, are too small to hold large dice at their default size. But keep in mind that you can always scale up a design if you really like it but it’s a bit too small.
There are also different styles of opening and closing. Some dice boxes have hinged lids, while others have lids that completely come off. A lot of people like the separate lid style, but if you’re worried about losing your lid then it’s better to keep it attached with hinges.
If you can’t find anything that you like for free online, then there’s always the option of designing one yourself. It might seem daunting, but a box is one of the easiest things to 3D model, so it’s a good first project if you want to learn 3D modeling. I recommend OpenSCAD, because it’s a free software that’s good for making things that are geometric, like boxes. OpenSCAD also works well for making adjustable items. This means that you can go into the program and change the parameters of different measurements of your object.
Different Filaments
PLA is still the most common type of filament for hobbyist 3D printers, but there are still a wide variety of options to choose from. The range of colors that you can buy just keeps growing. There are metallic colored filaments, marbled filaments, and even wood fiber infused filaments. If you find a filament that you really like, you won’t even need to paint it.
Wood fiber filaments are a good choice for dice boxes in my opinion, because a lot of quality dice boxes that you can buy are made of wood. While it’s not the same as a wooden dice box, it imitates the texture and feeling of warmth that you get from wood. You can sand it after printing to remove some of the layer lines and give it a nice smooth finish.
Painting
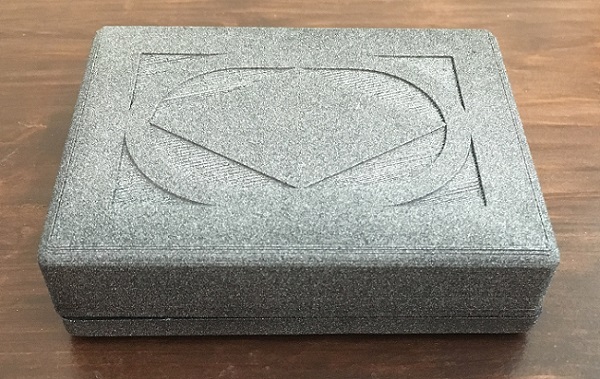
If you want to customize your dice box a bit more, then painting is an option. When painting 3D printed objects, it’s a good idea to use a primer that will stick to plastic, because paints don’t adhere very well to PLA. If you want to remove any layer lines and end up with a smooth finish, then I recommend that you coat it with a few layers of filler primer first, and then sand it smooth. There are other methods to smooth out PLA prints but filler primer is one of the easiest in my experience.
There are endless ways to paint and customize your dice box, so it’s really up to you and what you want to express. For my dice box I spray painted it black, then misted some metallic spray paint over that to give it a speckled appearance. After that I gave it a coat of clear coat. Clear coats will help to protect your paint job and make it last longer.
Linings
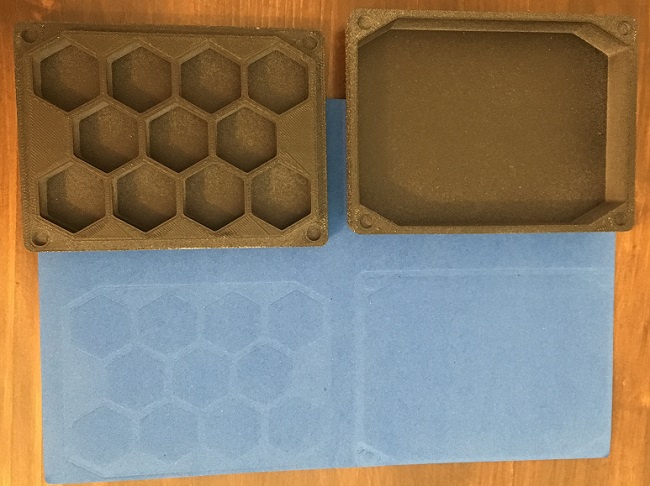
Linings will help to keep your dice from rattling too much inside your dice box. You don’t necessarily need to add a lining, but I think most people will because it really helps to cut down on the noise.
There are 3 common materials that are used for lining dice boxes, and those are: Foam, Leather, and Felt.
Foam is good because it’s cheap and easy to clean. You can easily find it at craft stores and it comes in a wide variety of colors.
Leather is more expensive but gives a much higher quality appearance. Harder to find in stores but easily bought online. Also comes in different colors.
Felt is kind of an old school liner material, but it has its own appeal. Easily found at craft stores, and comes in different colors.
To attach the liner to your dice box, simply cut it out to fit the shape and glue it down with the glue of your choice. You can use super glue, hot glue, or even spray adhesive. If you use hot glue, be sure to press it down flat otherwise it might leave raised areas. Some areas might be small enough that the liner will stay in place just from friction, so you won’t even need to use glue.
One good thing about using foam as liner is that you can press the halves of your dice box onto it and it will leave an impression in the foam. This makes it easy to get the exact shape of the pieces that you need to cut out. For the other materials, you might want to make a paper pattern first to test the fit of the lining, then use that to cut out your material.
Closure Methods
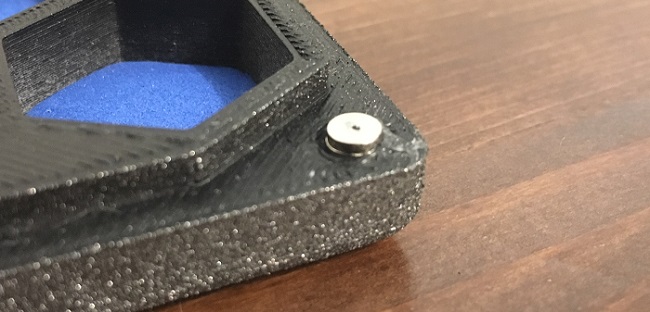
A lot of dice boxes use magnets to keep them closed. Magnets are a good option because they’re relatively secure, as long as you get some that are strong enough, and they give a sleek appearance to your dice box. If your dice box is designed to use magnets, then it should have some recessed holes in the top and bottom. I just used some hot glue to attach the magnets on mine.
If you use magnets, make sure that they’re arranged so that their polarity is in the right direction. For example, all of the magnets on the bottom half should have their north pole facing up, and all the magnets on the top should have their south pole facing down. This way the magnets will always attract each other no matter how you orient the lid.
It helps to mark one side of each magnet with a marker so that you can easily keep track of which side goes where. I put a small dot on the inner side of each magnet so that it’s not visible after gluing.
If you want something a little more secure, then there are some dice box designs that have hinges and latches on them. Here’s one that I found that looks like a treasure chest.
