3D printed chainmail is a good alternative to metal, especially for costuming purposes. It’s lighter, easier to produce, and can even be made in a multitude of colors. When I say that it’s easier to produce than metal chainmail, I mean that you don’t need to assemble it one ring at a time. You can print out large sections of it at once, and then piece those together. As long as your print settings are good, then you can just leave it to print while you work on other things.
This article will go over all of the things that I’ve learned about how to optimally 3D print chainmail, so that you can avoid the problems that I had in the beginning. I’ll also go over the different styles of 3D printed chainmail, and what kind might be best for you. There will also be some explanation of different colors of plastic and paint.
Choosing A Style
If you look online for 3D printed chainmail, you’ll find that there are many different designs to choose from. A lot of them look futuristic and angular. Some look more like traditional chainmail. If you’re trying to make a medieval fantasy themed costume, you probably want to use a design that uses round rings, unless it specifically calls for something different. For some costumes, are more distinct style like square rings might be more appropriate.
There are some designs that are even more advanced, and it’s almost difficult to call them chainmail anymore. The links are much more complex than just rings. Some of them are designed to have multiple holes in each link. These would be good for sci-fi costumes, because they have kind of a space age look. I haven’t really done much with this type of 3D printed chainmail, so this article will focus more on the simple ring designs.
Plain Ring Chainmail
Even for plain ring chainmail, there are different designs that people have come up with to make them easier to 3D print. The simplest form is to have the rings be flat and circular. However, that requires the rings to be printed at an angle instead of flat on the bed. This causes issues with the rings becoming dislodged from the print bed, because they only have a little bit of surface area touching the bed.
Some designs get around this by putting some extra curvature into the rings, giving them a compound curved shape. Others have built in grooves to allow for the space of the other rings. This allows the rings to be printed in more of flat configuration, and still be interwoven together. The only down side to these designs is that they lose a bit of authenticity by changing the shape of the rings. Aside from that, they’re much easier to print.
If you just want some 3D printed chainmail with simple circular rings, don’t worry. Those designs exist, but they’re just a bit tricky to print. I’ll have a link here to the thingiverse page of the design that I use. The rings on this design are a bit large at just over ¾ of an inch for the external diameter, or about 2 centimeters.
Benefits Of Using Larger Rings
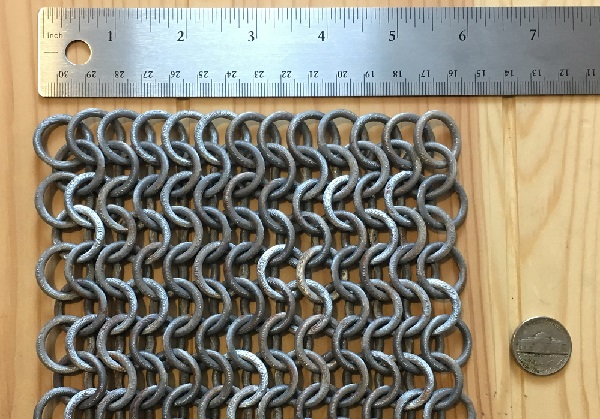
A sheet made of larger rings will have fewer rings per sheet than one made up of smaller rings. This means that you will have fewer rings to join together when you connect the sheets, which will save you time. Making chainmail can be quite a long and tedious process, so it’s nice to speed it up a bit.
Larger rings are also more noticeable than smaller rings. In other words, the pattern of the chainmail will stand out more than if you used small rings. A lot of chainmail designs that you see in video games and movies have large rings, probably to exaggerate the detail and make it easier to see. It will also help it to stand out in photos.
Problems With Printing Chainmail
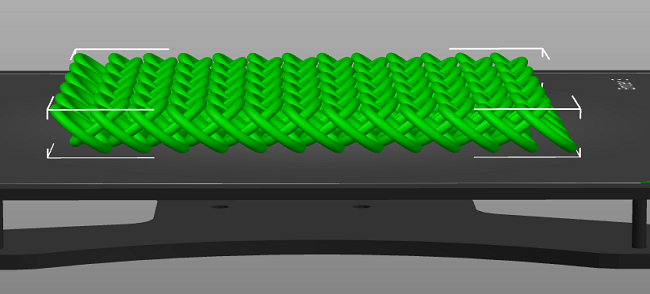
In order for the rings to be printed in one interconnected sheet of chainmail, they’re set at angles. If you look at the picture above you can see what I mean. This orientation makes for some problems though.
The main issue is the overhang on some of the layers. Because of the angle that the rings need to be printed at, some of the layers overhang pretty far, and that causes them to curl up as they cool. Once they’re sticking up, it becomes very easy for the print head to run into them and dislodge them from the print bed.
Once they’ve been knocked out of place, they can interfere with the other rings, causing a chain reaction that dislodges other rings. If it was just a few rings missing from one sheet it wouldn’t be too bad, but after a certain point it isn’t really worth letting it continue. The printer will keep depositing plastic where the rings used to be, which will end up getting stuck on the other rings. It really just becomes a mess.
This is why so many designs focus on making it so that the rings can print flat. However, like I said earlier, the only way to print these simple round rings is in this angled configuration. Luckily, with just some minor modifications to the print settings, these designs can be printed successfully without losing a single ring.
Print Settings
To make sure that the rings stay on the print bed, you have a few different options. One way is to increase the amount of plastic at the base of the rings so that they have more surface area attached to the print bed. The designer of the chainmail suggests that you print it on a raft. This will put a layer of support material underneath the whole sheet, which the rings will sit on top of. It’s a good option, but it uses a bit more plastic.
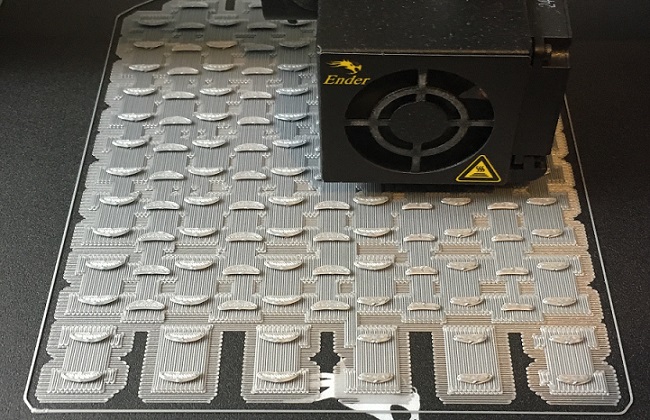
If you want to save filament, you can tell your slicer to add a brim to the object. This will create a little pad of plastic around the bottom of each ring, to help it stick to the bed better. You can adjust the brims to be any width you want. The problem with adding brims is that you have to peel them off later, which can take a while with so many rings. The advantage of using a raft instead of brims is that the raft can be peeled off in one big piece. However, if you make the brims wide enough, they will join together, making them easier to remove.
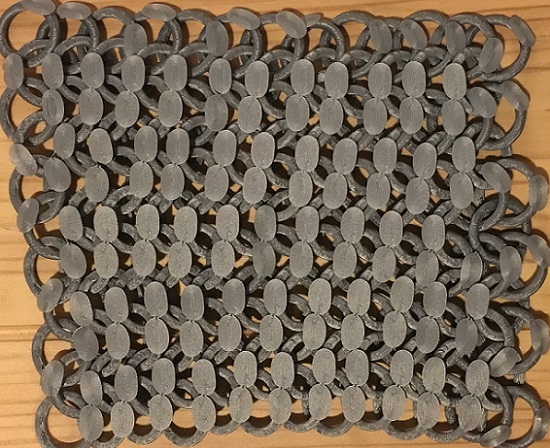
The designer also recommends that you raise the print head a very small amount, so that it will be less likely to hit the pieces of plastic that curl up. This isn’t a bad idea, but I found that my rings were curling up a lot higher than the amount he recommends raising it by. Some slicers have the option to raise the print head every time a retraction occurs, or if the print head moves a certain distance. If you have options like that, they might help, but they will also increase the print time significantly.
Filament Colors And Painting
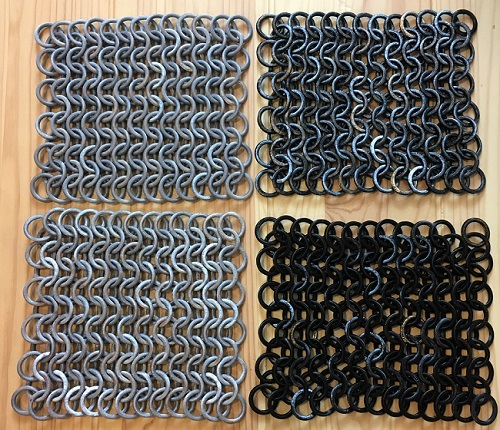
Because the rings are interwoven, they’re very difficult to paint with spray paint, which is normally a good way to paint 3D printed objects. The normal thing to do is spray the piece with a coat of primer first, because otherwise paint won’t stick very well to PLA plastic. But because the rings are overlapping, there will be a lot of spots where the paint won’t reach. You would have to adjust the rings after one coat has dried and try to maneuver the rings so that any unpainted spot are exposed.
To avoid all that hassle, you can just print the rings in the base color that you want the rings to be. If you want your chainmail to be silver, print it with a silver or gray filament. If you’re going for a darker looking chainmail, then maybe print it with black filament.
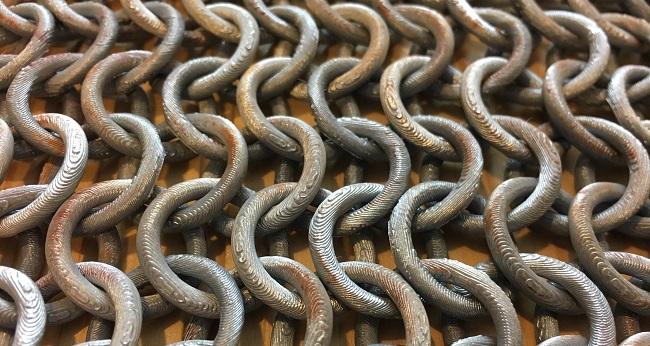
You can still apply paint directly on the plastic if you want, and I have done that. A coat of silver paint helps to make the rings look more metallic. You could also mix up some reddish brown paint and apply it in places to give the appearance of rust. Just be aware that the paint will probably start to flake off after a while, especially as the rings move and scrape against each other.
